Why Monitor Calibration Matters
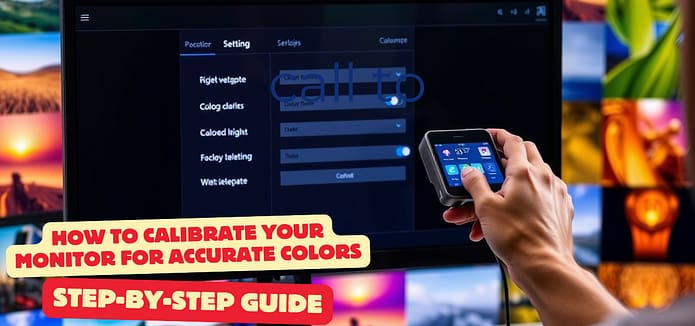
Imagine spending hours editing a photo or video, only to realize the colors look completely different on your client’s screen. Frustrating, right? That’s where monitor calibration comes in.
Calibrating your monitor ensures that the colors you see are accurate and consistent across devices. Whether you’re a graphic designer, video editor, or photographer, proper calibration is essential for delivering professional-quality work.
The good news? You don’t need expensive tools to get it right. In this guide, we’ll show you how to calibrate your monitor using free software, built-in settings, and a few simple tricks. Let’s dive in!
Table Of Content
Step 1: Understand the Basics of Monitor Calibration
Before we get into the how-to, let’s cover the basics.
A. What is Monitor Calibration?
Monitor calibration is the process of adjusting your screen’s settings to ensure accurate color reproduction. This involves:
- Setting the correct brightness and contrast.
- Adjusting the color temperature (measured in Kelvin).
- Ensuring consistent gamma levels.
B. Why is Calibration Important?
- Consistency: Ensures your work looks the same on other screens.
- Accuracy: Prevents color shifts that can ruin your edits.
- Professionalism: Delivers high-quality results to clients.
C. When Should You Calibrate?
- New Monitors: Out-of-the-box settings are rarely accurate.
- After Updates: Software changes can affect display settings.
- Every 1–2 Months: Monitors drift over time, so regular calibration is key.
Step 2: Prepare Your Workspace
Calibration is only effective if your workspace is set up correctly.
A. Lighting
- Use neutral lighting: Avoid harsh overhead lights or sunlight.
- Bias Lighting: Place a soft light behind your monitor to reduce eye strain.
B. Monitor Settings
- Reset your monitor to factory settings before calibrating.
- Allow your monitor to warm up for 30 minutes before starting.
C. Tools You’ll Need
- Free Software: DisplayCAL, QuickGamma, or your OS’s built-in tools.
- Test Images: Download free calibration images (e.g., from Lagom LCD).
- Your Eyes: Trust your judgment, but use tools to guide you.
Step 3: Calibrate Using Free Software
Here’s how to calibrate your monitor using free tools.
A. DisplayCAL (Windows/Mac)
- Download and Install: Get DisplayCAL from displaycal.net.
- Set Up Your Monitor:
- Choose your display type (LCD, OLED, etc.).
- Select the color profile (sRGB, Adobe RGB, etc.).
- Run the Calibration Wizard:
- Adjust brightness, contrast, and color temperature.
- Follow the on-screen instructions to fine-tune settings.
- Save the Profile: Apply the new profile and set it as default.
Pro Tip: Use a colorimeter (if available) for more accurate results.
B. QuickGamma (Windows)
- Download and Install: Get QuickGamma from quickgamma.de.
- Adjust Gamma:
- Use the sliders to match the gray bars on the test image.
- Aim for a neutral gray without color casts.
- Save Settings: Apply and save your adjustments.
C. Built-in Calibration Tools (Windows/Mac)
- On Windows:
- Go to Control Panel → Color Management → Advanced → Calibrate Display.
- Follow the wizard to adjust gamma, brightness, and contrast.
- On Mac:
- Go to System Settings → Displays → Color → Calibrate.
- Use the built-in tool to adjust white point and gamma.
Step 4: Test Your Calibration
Once you’ve calibrated your monitor, it’s time to test the results.
A. Use Test Images
- Download test images from Lagom LCD.
- Check for:
- Brightness: Ensure black and white levels are accurate.
- Contrast: Details should be visible in both dark and light areas.
- Color Accuracy: Colors should look natural and consistent.
B. Check Real-World Content
- Open a photo or video you’re familiar with.
- Compare it to another calibrated screen (if available).
C. Adjust as Needed
- Fine-tune settings if colors still look off.
- Repeat the calibration process if necessary.
You can also read our The Best Budget Monitor For Graphic Design
Step 5: Advanced Tips for Pro-Level Calibration
Take your calibration to the next level with these pro tips.
A. Use a Colorimeter (Optional)
- What It Is: A device that measures color accuracy.
- Budget Option: X-Rite ColorMunki Smile ($149).
- How to Use: Follow the device’s instructions to create a custom color profile.
B. Calibrate for Specific Workflows
- Graphic Design: Focus on sRGB or Adobe RGB.
- Video Editing: Use DCI-P3 for cinematic work.
- Photography: Ensure accurate skin tones and natural colors.
C. Regularly Recalibrate
- Monitors drift over time, so recalibrate every 1–2 months.
- Check settings after major software updates.
Common Mistakes to Avoid
- Ignoring Lighting: Poor lighting can skew your perception of colors.
- Over-Adjusting: Small tweaks are better than drastic changes.
- Skipping Testing: Always test your calibration with real-world content.
- Using Default Profiles: Factory settings are rarely accurate.
FAQs
Q: Can I calibrate my monitor without a colorimeter?
A: Yes! Free tools like DisplayCAL and QuickGamma work well for most users.
Q: How often should I calibrate my monitor?
A: Every 1–2 months, or after major software updates.
Q: Do I need to calibrate my laptop screen?
A: Yes, especially if you use it for color-critical work.
Q: Can I use my phone to calibrate my monitor?
A: No—phone screens aren’t accurate enough for calibration.
Q: What’s the difference between calibration and profiling?
A: Calibration adjusts your monitor’s settings, while profiling creates a color profile for your specific display.
Conclusion: Calibrate Like a Pro
Calibrating your monitor doesn’t have to be complicated or expensive. With free tools, built-in settings, and a little patience, you can achieve professional-level color accuracy—no fancy gear required.
Ready to get started? Download DisplayCAL or QuickGamma today and see the difference for yourself!


